Page 7 of 9
Posted: Sat Aug 06, 2011 3:09 pm
by Horus
Kiya don't worry about the creases spoiling any picture you decide to use, regardless of whatever you pick it will look OK, because your eyes are not really looking at the detail of the picture, but more the illusion it creates.

Posted: Sat Aug 06, 2011 5:58 pm
by Kiya
My final finished crumpled old photo, did it twice! not sure what I did the 1st time but I lost it all.
Mr Tutor I used your white crumpled photo this time it looked whiter than mine & had to resize everything, finally got there


Posted: Sat Aug 06, 2011 7:11 pm
by Horus
I hate to say "I told you so" but I will,
that picture looks a lot better, in fact I think it works really well.
You have certainly mastered this technique, so that's another one to add to your growing collection of photo manipulation.

Posted: Sat Aug 06, 2011 8:51 pm
by Kiya
Thankyou Mr Tutor
I hope you keep them coming
I wonder what you can teach us next

Posted: Sun Aug 07, 2011 12:36 am
by Horus
You are welcome Kiya
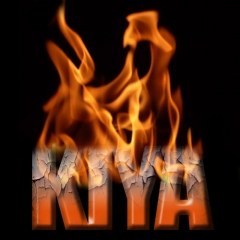
How about trying to do this?
[i
Posted: Sun Aug 07, 2011 9:28 am
by Grandad
Have I missed something somewhere
Kiya seems to be racing away and I am still at the creased lines plus Horus' emailed scrunched paper and texture images????
Have I missed a lesson? Or is 'head girl' getting private tuition.

Posted: Sun Aug 07, 2011 10:23 am
by Horus
Actually Grandad she is

and Kiya has been a very keen student and was doing very well even before I started the forum tutorials.
But because there was very little interest or input, it was becoming a waste of my time posting it in the tutorials as it does involve a lot of work to do so. I often wondered if I was just talking to myself and not really knowing if anyone else was interested or not, so I posted this which you probably missed:
http://www.egypt4u.com/forum/viewtopic.php?t=1602
I will still help people out who are interested, but the onus will be upon them to contact me and request the tutorial and I will then assume they will either contact me again if they want to move on to the next part, or if they see something new that I post and they want to try it out themselves.
It is easier for me to use a direct email to send the information as I can just copy any picture files you may need directly into the email and I do not need to go through the long winded resizing and uploading to the forum, especially if it is only for one or two people. It also tells me when someone needs to continue as they will get back to me, rather than the current situation where I do not know if anyone is actually involved in doing the tutorials and I am just wasting my time.
I had hoped that it would add a common interest as a group topic, but it does not look as though there was a wide enough support for it to continue,

but as I said, I will still continue to do it on a personal basis.
Grandad, if you have finished TUTORIAL 5, Part 2 then I will email you TUTORIAL 5, Part 3 which is the final part.
Posted: Sun Aug 07, 2011 12:25 pm
by Kiya
Yeah!! that fire/name pic looks cool, I'd be ready to start that tutorial anytime when your ready Mr.Tutor.
Grandad I'm looking forward to seeing your finished " old crumpled photo" on here, hope you choose a better pic than I did with my 1st effort.
Also I'm only slightly ahead of you just because I've more time on my hands at the moment...."home alone"
Have to say I'm really enjoying learning these new techniques
Posted: Sun Aug 07, 2011 12:38 pm
by Grandad
Horus I had missed that post for some reason.
I would appreciate that final part for the 'Old Picture' tutorial because I want to finish my project.
I DO understand all that you say about all your time spent with apparent little interest.
What you have done is whet mine and others appetites to explore the potential of our photo editors which most of us probably use for just cropping, alignment and colour adjustment.
I for one am now much more confident to investigate what I can achieve, thanks to your valued introduction to much of what hides in the toolbox and the menus. So thanks a lot for that and I will take up your offer of help if I get stuck on something.
Regards
Grandad
Posted: Sun Aug 07, 2011 1:39 pm
by Horus
Grandad, Part 3 of Tutorial 5 should be in your inbox by now
and thanks for your kind comments.
Kiya, do you want to do the one I have posted as an example, or do you have something else in mind with a similar effect used on it?
Posted: Sun Aug 07, 2011 3:34 pm
by Grandad
Received with thanks H
Could the file for that 'flaming name' thing be reduced for use as an avatar or signature
I like the originality.
Posted: Sun Aug 07, 2011 3:46 pm
by Horus
I suppose it could be, it may also be possible to animate the flame, the biggest problem will be the restricted upload size as it may lose a lot of detail, maybe Keefy can let us know what format and size will upload as I have tried in the past to put animations on for you to look at and they won't upload.
Posted: Sun Aug 07, 2011 4:20 pm
by Kiya
Yep I'll carry on with your flaming picture....ta muchy
Posted: Sun Aug 07, 2011 5:19 pm
by Grandad
Well, got there in the end.
Now I need to do all the tutorials again from square one to try to remember all the 'moves'.
The old memory is failing so I guess some notes are called for........
Here is my effort:

Posted: Sun Aug 07, 2011 5:50 pm
by Kiya
Well Done Grandad & a very good choice of photo too
Posted: Sun Aug 07, 2011 5:51 pm
by Horus
Excellent GD and another 10/10 for a perfect result.
Good choice of subject as it lent itself to ageing quite nicely, may I suggest that you both keep your crumple borders a little smaller so that it does not detract too much from your main picture and the background texture?
Also don't forget to try some without the ageing effect as with the right picture it can also work very well.
And Grandad .................. notes are good
how do you lot think I ever remember anything
Posted: Sun Aug 07, 2011 10:07 pm
by Grandad
Just a couple more pictures aged, and then I will save more exploring of the program until the winter months. I usually do this sort of thing then when the days are short.
I used a picture of Sheffield Park and treated it by the methods that we have learnt, one leaving the colour and one changing to sepia. And to try a slight variation I divided the creased layer into 9 panels.
This is how they came out:


Posted: Sun Aug 07, 2011 10:48 pm
by Horus
That's exactly what I like to see GD, having first learned the method then having a play about with it to see how it can be applied, you should have plenty to keep you busy during the Winter months now.
Edit: And the border looks better now.
Posted: Sun Aug 07, 2011 11:39 pm
by Horus
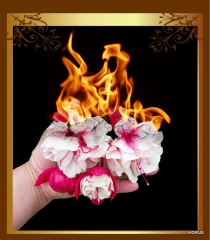
Kiya, here is a quick variant on the theme.
Posted: Mon Aug 08, 2011 12:35 pm
by Kiya
I think I prefer the " flaming name " I don't get it with flames coming from lovely flowers or is my imagination not with me today
