Making Spheres in Elements
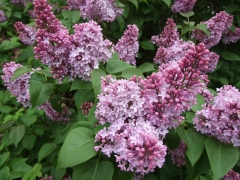
1. First of all select a suitable image, most will do, but flowers, Butterfly’s etc. are very good.
2. Open Elements, add your image and be in ‘Expert’ mode.
3. Use your square selection tool and pull a square across a suitable interesting area in the image.
( Note! you may have to choose the ‘square’ shape from the tool options menu at the bottom.)
(Also Note! If you don’t know already, you must hold down your ‘Shift’ key as you pull the square other wise it becomes a rectangle and they don’t work properly.)
4. This should leave you with a perfect square with the ‘Marching Ants’ all around it.
5. With the ants still visible, Go to ‘Edit’ and choose the option ‘Copy’
6. Now from your top menus choose ‘File’ > ‘New’ then ‘Image from Clipboard’
7. With this as your new image, now go to your top menu again and choose the ‘Filter option.
8. From the drop down menu choose the ‘Distort’ then ‘Polar Co-ordinates’ options.
9. From the next menu make sure you choose the ‘
Polar to Rectangular’ option.
10. The next image will look very strange and distorted, but that’s OK.
11. Now go to your main menu again and choose ‘Image’ > ‘Rotate’ > 180 degrees and this will flip your distorted image upside down.
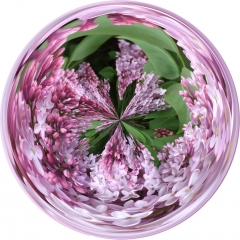
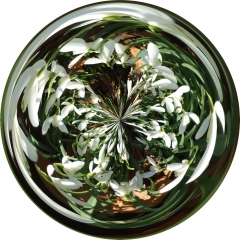
12. Now repeat the step ‘Filter’ > ‘Distort’ then ‘Polar Co-ordinates’ but this time ensure you choose the ‘
Rectangular to Polar’ option instead.
13. To isolate your sphere from the background, use your ‘Magic Wand’ selection tool and set the tolerance very low, to about number 2, then select the outer background.
14. Next go to ‘Select’ on the main menu and ‘Inverse’ your selection.
15. Next you can either go to ‘Edit’ > then ‘Cut’ which will leave you with a chequered background which you can bucket fill with another colour, or you can choose to do an ‘Edit’ > then a ‘Copy’ and then open up a New Blank file and ‘Paste your ‘Copy’ into the new file, or again you could paste the copied sphere as many times as you like into another or several other images.
16. Alternatively you could create a new layer with a gradient as a background and position it under your ‘Cut’ layer that had the chequered background to create a different effect.
17. Also worth knowing is that when you have something copied onto the ‘Clipboard’ if you choose to open a ‘New Blank File’ instead of using ‘File’ > ‘New’ then ‘Image from Clipboard’ then the ‘New Blank File’ is always the size required to match any copied image on the ‘Clipboard’.
This should stop you getting bored for a few days, so off you go and experiment.